Showing posts with label flask. Show all posts

Saturday, July 6, 2013

Orchid Flask Review

Last week, fellow South African orchid blogger David Vaughan, who blogs at http://phalaenopsisspot.blogspot.com, offered to send me a flask of Dendrobium crystallinum to review. I did point out that I was quite inexperienced at deflasking, but he still insisted it was a good idea... Never one to say no to plants, I quickly agreed. David enjoys growing orchids from seed, a topic I am intrigued by, but have never gone through the effort of doing, due to the difficulties of creating the sterile growing conditions and meeting the other requirements (like space...!) for successful in vitro germination and propagation of orchids.

If you're not particularly familiar with the topic, orchid seeds are mostly almost microscopic and dust-like, with little if any "food" in them (compared to the larger seeds of other plants, which have the embryo and a parcel of "food" to give it a head start in life). Orchids take a slightly different strategy - they make millions, even billions of tiny seeds that are little more than embryos without any "food" stored away. So in nature, they have to be really lucky to grow up. What happens with most orchids is a few of the seeds happen to settle somewhere where the right kind of fungus (called an "orchid mycorrhiza") just happens to be growing, and the orchid baby then basically germinates and then steals nutrients from the fungus, which is where it gets the energy to grow big enough to start producing its own sugars from photosynthesis; in some cases the orchid may ultimately give something back to the fungi, but I believe most orchids are quite "selfish" in this relationship, and many seem to keep leaning on the fungus throughout life to supplement their food supply; a few orchids don't photosynthesize at all (so-called "achlorophyllous" orchids) and get all their nutrients from fungi [many plants have fungal partners (mycorrhizae), which they give sugars in return for micronutrients and water; some plants "root systems" end up being mostly fungi; many garden plants will benefit from such fungi and you can buy cultures of them]. Interestingly, the kinds of fungi orchids "team up" with are often pathogenic (cause disease) in other plants. Really young orchid "seedlings" are made up of strange "lumps" of cells called "protocorms" - they look quite unlike any seedling you've ever seen. A little later in their development, the "protocorms" differentiate and produce roots and shoots.

Obviously, growing orchids this way (using fungi) is mostly really hit or miss, so several decades ago, people came up with the idea of giving the orchid embryos everything they need to develop in a sterile "petri dish" (known as a "flask"). Of course, if you put something in a rich nutrient broth, other things are also going to take advantage (bacteria and fungi) so you have to ensure not a single one makes it into the flask with the orchid - which is perhaps the hardest part of the process (of course, getting the growth media right is an art and science in itself...).

Anyway, after that little diversion about orchid seeds, germination and fungi, on to the flask itself!

Review
I asked David to randomly select one of the flasks he'd prepared to send to me. As David asked me to independently "review" the flask, I'll split this up into a couple of sub-sections.

Packing/packaging
The flask was very well packed, nestled in bubble wrap and packing "peanuts" and arrived the day after he sent it. Once unpacked, the flask was nicely labelled with a picture of the flower of the adult plant, along with the name, and on the back, useful unflasking instructions and of course records of when the plants had sown and been put (replated) into the current flask on the lid. The lid is also well sealed with tape, which should help prevent too much inadvertent contamination, or horror-of-horrors the flask opening in transit. Perhaps it's no coincidence that as someone who cares for living things as a profession (when not mucking about with orchids, he's an aquarist specialising in fish health) David is evidently well versed in how to pack living things for travel!

I took a couple of quick shots when I unpacked on Friday (28 June) last week:
Well packed!
Under the "peanuts" was a nifty construction of bubblewrap
that suspended the flask in transit
Helpful labelling.
Name of plant and picture of flower of this species, Dendrobium crystallinum.
Why, postman, why?
Of course, the post office completely ignored the "this way up at all times" stickers, and the box was handed over to me on its side. I suspect the flask spent some of its journey in the wrong orientation, as the "plug" of medium in which the seedlings are growing was lying at about 45 degrees across the container (it still is as I haven't really had the heart to slam the flask hard enough to dislodge it back into place). The plants seemed unscathed, and the agar wasn't too shaken up. Of course, there is little the sender can do to prevent this sort of thing in transit; I've seen parcels make it through the South African post and even deliveries by courier companies looking like a herd of elephants has used the packaging as a trampoline, so this was relatively pristine! Pictures below are immediately after unpacking.

Dislodged plants and medium - not too bad!
Dislodged plants and medium, other side
Impressions
I've had the flask in my possession for a week now, and everything still looks great; the flask has been sitting on a seed germination/propagation "heat mat"/germinator (supposedly should keep them at 19) as it is midwinter here, and David suggested they'd prefer being kept more around 18 degrees or above than suffering through the 10 degrees or so the balcony is currently experiencing at night.

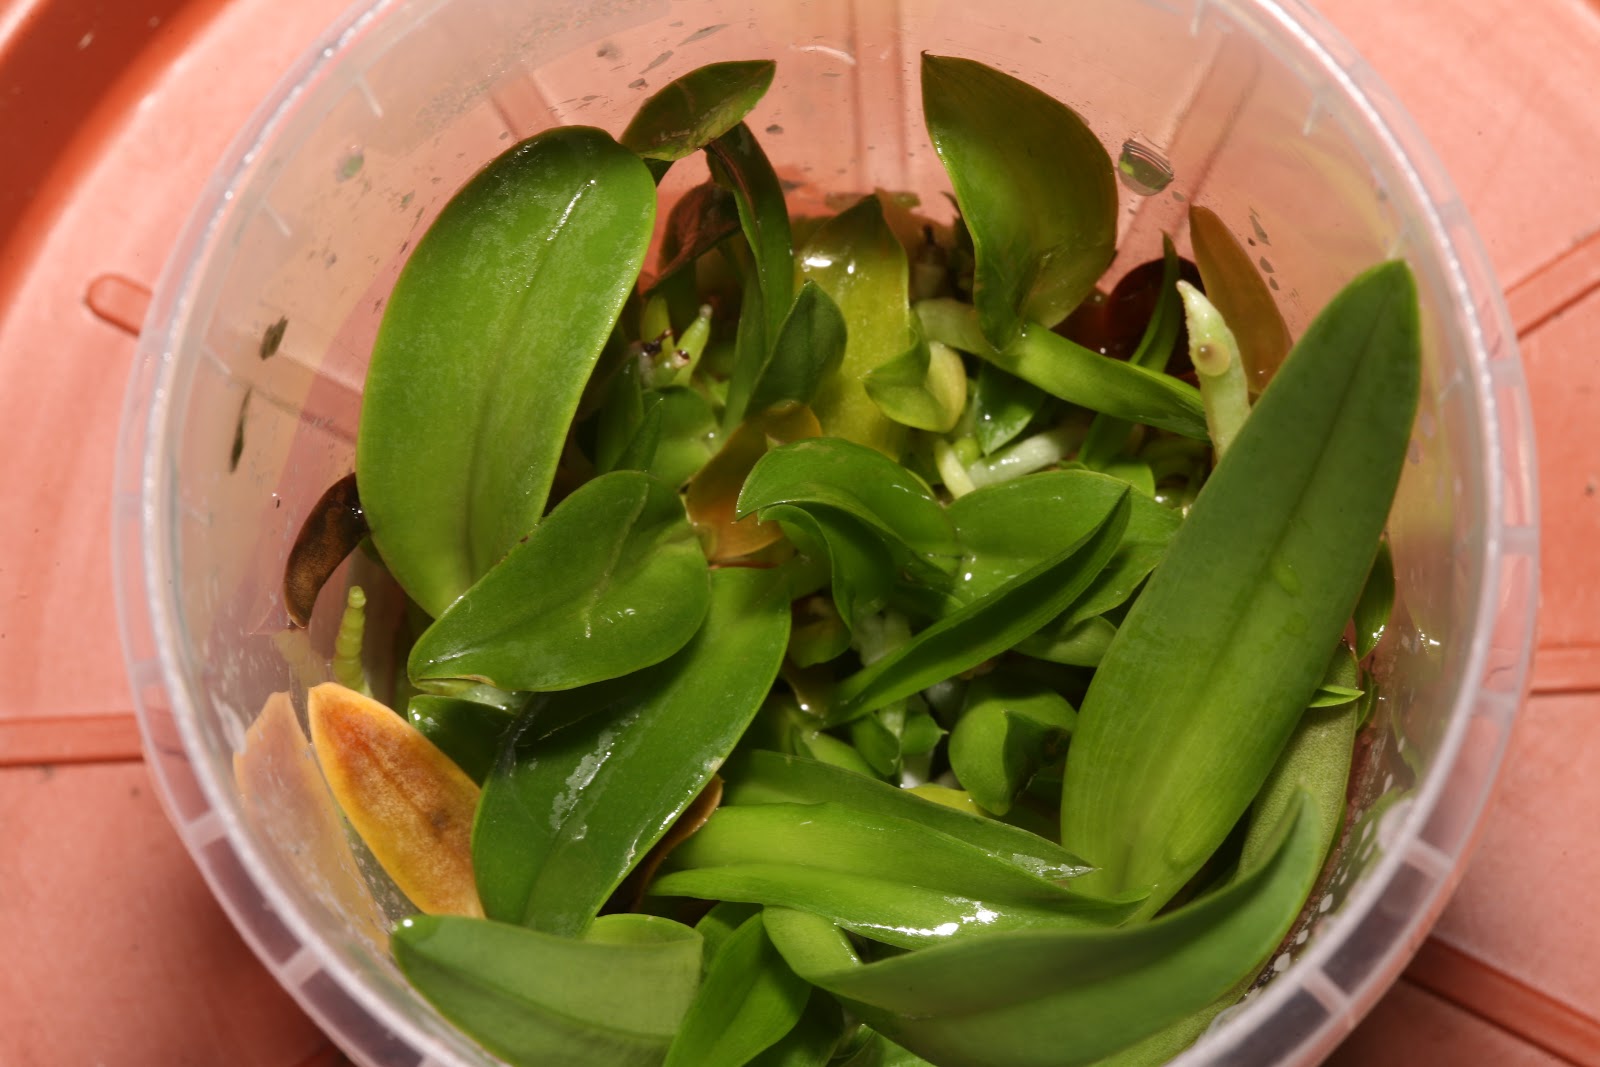
The seedlings all look very healthy to me; they seem large enough to make it through the "deflasking" process, and the leaves and roots seem well formed. They'll still be happy in the medium for a little while; I'd like to only deflask when I get to try out a product (AgriSil) I cover below under "tips".

Some shots from today (Saturday 6 July):
Good roots.
Strong, healthy shoots
Healthy baby orchids
It is quite hard to take good macros through slightly cloudy plastic which is all fogged up!

A few of the plants around the edges were looking a little "ragged" - this is either from transport damage or from where they ended up sitting in a "puddle" of water - I've since tipped the flask at an angle to stop this from happening; the damage is quite minor however - and no fault of David's. 

Some tips from David
I discussed the difficulties I'd had with deflasking, most notably with fungi, and David recommended trying a supplement rich in silica to help "harden off" the fragile seedlings; this is a fairly unusual supplement that doesn't seem to have yet made its way into the general gardening realm in South Africa, so is only really availble from agricultural suppliers, who tend to sell it in large volumes. It's not particularly expensive, but the courier costs I was quoted for delivery were outrageous (in the region of 5 times the cost of 5 litres of the product), so I have yet to acquire any. The supplement is called AgriSil K50, manufactured by Plant Health Products, and distributed in South Africa by Madumbi. They also do some very interesting looking "bioweapons" for plant health! The product he mentioned, AgriSil, is basically a solution of Potassium Silicate. Plants use silica to build stronger cell walls - essentially out of glass - and that helps keep out invaders like bacteria and fungi. The dose he recommends is 2.5ml of AgriSil per litre of water adjusted down to pH 6.5 (AgriSil starts at pH 11!); the rinsed seedlings (roots only) are then soaked in this for 12 hours before being potted up in a community pot ("compot").

I'm quite keen to try out this approach, as it makes sense to me. Armour coating an orchid in glass from the inside? I'm in! 

He also noted he'd experienced more success deflasking into (small!) bark chips than any other medium, as he'd also found media that retain a lot of water (like sphagnum) tend to encourage problems with fungi and bacteria. My previous deflasking trials lead to the complete loss of all the cattleyas in pure moss, and I only got 4 out of the one which was mixed moss/bark (bacteria and fungi). Later on some scale moved in and started wreaking some havoc...It's possible I also was too cautious in maintaining high humidity for too long - I left the propagator lids on the plants for many weeks; typical "hardening off" times are apparently more like a fortnight.

David currently has flasks of Dendrobium crystallinum available for sale (presumably only within South Africa due to shipping complications with orchids across international borders), with several other species and hybrids close to being ready. He keeps a list of what is available on his blog at http://phalaenopsisspot.blogspot.com/p/the-availability-list.html. Each flask is about R175 plus postage, and contains roughly 30 plants. It will probably take several years before you see your baby orchid flower, but it's quite rewarding, and if you want lots of one plant (or maybe some spares to share/sell) it's a good way of getting plants, and often a great way of getting unusual plants.Given the sample of this species I've received, I can't say I have any hesitation whatsoever in saying that if he has something you're interested in acquiring, you should get hold of him! It's also often quite interested to raise a bunch of the "same" plant up and notice how much variation there can be in a species or especially a single hybrid cross, particularly in the flowers.

If you'd like to follow these seeds from their "birth", check out these two posts from his blog:
http://phalaenopsisspot.blogspot.com/2013/04/dendrobium-crystallinum-babies.html
http://phalaenopsisspot.blogspot.com/2013/05/may-babies.html

Deflasking seedlings is an interesting additional "angle" to growing orchids; it's not quite as easy as growing many "normal" plants from seed, but most of the hard work is out of the way when you get a flask of seedlings that are ready to be de-flasked and potted up. Give it a go!

Tuesday, March 15, 2011

Plant Update - new spikes! New Flowers!

I took some pictures on Sunday afternoon of some progress at OOAB HQ.

First up, our lovely Stenoglottis S0703 (Sten. Saturn 'Electric' x Sten. woodii 'Gous') has finally flowered after watching three spikes slowly grow. The spottiness of the leaves carries on into the flowers!

I've since found out this cross is called Stenoglottis Ganymede - quite a good name seeing as Ganymede is one of Saturn's moons!
Stenoglottis Ganymede spike - one of three!
Flowering Triffid Stenoglottis
Stenoglottis Ganymede flower
Not all the flowers on the spikes have opened yet. We're thinking of taking this one to the EPOS meeting on Thursday this week.

Next up, out Rhynchostylis coelestis has not one but two spikes on it. Guess the little bout of fungus or whatever hasn't worried it too much...

Looks like the flowers will be purple-ish or lilac-y. Don't think it'll be open by Thursday though!

Yay, buds!


Nearly opening...!
Second spike
Also, the bud on our Paphiopedilum Onyx has opened fully and is more symmetrical that the one on its friend.
Paphiopedilum Onyx
Finally, an update on the progress of our recently (~3 weeks) deflasked seedlings.
Some really hot, dry days took their toll, I think - this was before my propagator arrived, unfortunately, so I think some of them really took strain. They're now happily cocooned in the Garland Big 3 propagator - and I'm keeping a beady eye out for fungus. A few plants in each tray had started obviously dying, so I pulled them out.
Potinara/Rhyncholaeliocattleya(?)
(A18 Blc. Three Sun 'Sun #16' x Pot. Shin Shiang Diamond)
Note the dying seedlings :( 


Brassolaeliocattleya/Rhyncholaeliocattleya(?)
( Blc. A17 Blc. Chian-Tzy Salmon x Blc. Shinfong Luoyang 'Gold')
Fewer dying plants.
Not too bad, I think! In less positive news, this morning I finally noticed that our Microcoelia exilis is *covered* in scale, so I spent about 15 minutes scratching it all off with my fingernails - will have to do another once-over later on and keep an eye out for more of those buggers. I also saw a single mealybug on one of the plants and squashed it immediately.

Monday, February 21, 2011

De-Flasking 2.0

On Friday, I decided it was high time to de-flask some orchids I got from Stephward Estate, both are unregisted grex, as far as I know (if you've ever wondered what u.g. in a plant catalogue is, that's it).
  1. Potinara/Rhyncholaeliocattleya(?) (A18 Blc. Three Sun 'Sun #16' x Pot. Shin Shiang Diamond)
  2. Brassolaeliocattleya/Rhyncholaeliocattleya (Blc. A17 Blc. Chian-Tzy Salmon x Blc. Shinfong Luoyang 'Gold')
Some of the leaves were starting to turn variously yellow/brown/black, and despite being in a theoretically sterile environment, having dead things lying around in there just seemed like a recipe for disaster. They were also pretty crammed in there, and had even started pushing the plug of agar away from the bottom with their roots, and were last reflasked in about June 2010, so they may have been running out of nutrients. I opened the flasks up and poured in some RO water, and left them for about 24 hours.

A18 Blc. Three Sun 'Sun #16'
x Pot. Shin Shiang Diamond

Blc. A17 Blc. Chian-Tzy Salmon
x Blc. Shinfong Luoyang 'Gold'

Flats with gravel
I prepared some "flats" with a layer of coarse gravel at the bottom, then a layer of generic bark-based orchid mix; I then thought I'd top this with a mix of saorchids.co.za Disa mix (Sphagnum, quartz grit and osmocote), mixed with some vermiculite and perlite (what I hoped would be a fairly open, but moisture retaining mix). In hindsight, the bark-based orchid mix was a fairly bad idea as it's far too coarse for small plants, in fact, with the second flask, I omitted it (apart from a very thin layer at the bottom).

It was then time to open the flasks and work the little plants out of the growth medium.

Blc. A17 Blc. Chian-Tzy Salmon x Blc. Shinfong Luoyang 'Gold'
Notice some big leaves and roots!
The agar jelly slid out very easily,
leaving this neat "plug" of plants.
Closeup
Notice the healthy roots
and the dead/dying leaves
Roots!
The black stuff is the nutrient agar jelly;
notice how little is left relative to roots!
I then set about trying to separate each and every little plantlet - a pretty tough job it turned out to be. A lot of the roots had somehow grown together and were pretty tricky to separate, some being almost "glued" to each other. I used a pressure sprayer bottle to blast the gel clear of the roots, and then gentle persuasion with my fingers to get the plants apart. And my years of de-tangling fishing line experience...

Finally!
A bowl of seedlings, mostly cleaned of agar sitting in RO water.
The plantlets were left in a bowl of RO water (apparently they don't like drying out) and then planted one by one. I mixed the top sphagnum mix up with the bottom orchid mix; in the end, I ended up pulling lots of bits of bark out! There was quite a variation in sizes, and even some very weird looking plantlets that hadn't quite worked out where they were supposed to be growing roots and leaves. As far as I could, I planted them all. Each plantlet was inspected, trimmed of anything dead or dying (tricky and fiddly) and then nestled into the mix.
Finished "flat"
Note the sparse bark chunks
Closeup of seedlings
Then it was time to tackle the other flask.

 
A18 Blc. Three Sun 'Sun #16'
x Pot. Shin Shiang Diamond
The plants in this one seemed generally a bit bigger and fewer; they were certainly a lot easier to pry apart.When planting these out, I used a slightly different method. In this one, the seedling tray is put into another water-tight tray, which is filled with water up to the top of the seedling tray. This creates a "soup" of potting mix, which is much easier to push the seedlings into, and probably ensures a much better contact between root and medium after you pull it out of the water and let it drain.

More nice roots!
But also dead/dying leaves :(


Both flats, about 24 hours later.
First flat on the left, second on the right.
The seedlings are currently sitting on the couch right next to the humidifier; I'm trying to keep the humidity fairly high whilst they get used to the idea of being out in the open and not living in a soup of lovely nutrients! I didn't use any fungicide as people seemed pretty split on whether it was a good idea or not - it's probably enough of a shock to get pulled out of your comfy bed and stuffed into rough potting soil without also having a cocktail of moderately toxic chemicals poured all over you! I've ordered a thermostatically controlled Garland Big Three propagator, which I hope will help out, but this won't be here until late in the week. Certainly, I imagine the nice warm root bed will keep them happy through the OOAB winter, which will be here quite soon (despite some reaaaaally hot days lately).

Fingers crossed they thrive!

Thursday, January 13, 2011

De-flasking a micropropagated Disa

Whilst at Kirstenbosch National Botanic Garden in Cape Town on a boiling hot day, we found a some micropropagated Disas from the Cape Institute of Micropropagation and decided to see if we could manage to get them to grow; we also conveniently found a sphagnum-moss based potting mix there too, so we grabbed that whilst we were there.

Having pretty much outgrown its little flask, the Disa bivalvata was opened on Sunday, had distilled water added up to the top of the label as per the attached instruction leaflet, and after three days like that, it was time to pot up.

I sterilised a smallish (9cm) pot and some spoons in some hot water with Jik (household bleach) and then thoroughly rinsed it. The potting mix was rehydrated with distilled water.

You can see how ready it was to be potted!

I gently removed it from the flask with a teaspoon; the distilled water soaking loosens the agar up quite nicely.

Disa bivalvata unflasked, with some agar still adhering.
Given the rather nutritious agar and the susceptibility of Disas to fungal and bacterial root rots, it's a good idea to make sure all that gel is washed off the plants, roots and tubers. I used a pressurised spray bottle turned to a jet of water with distilled water to gently blast the agar off; this works quite well and is probably kinder to the delicate little plants than trying to remove it with tools or anything else.

Cleaned plantlets. 3 were in the flask.

I then mostly filled their pot with sphagnum-based potting mix, and gently packed a little ball of it around the roots and tubers before putting each plantlet into the pot and then putting more mix between the "root balls" to keep them in place.

Plantlets now in pot.

Old and new home (taken with dead flash batteries, hence the blur...)
Added to the collection!
The plants were then watered with 4g/l Fungi-Nil (captab) solution in Aquelle spring water; the instructions said to water with a "mild fungicide"; this morning I received an email from Hildegard Crous who runs the outfit that does the micropropagation:

The Captab works very well as it is somewhat systemic, otherwise the better known fungicide to use is Dithane, both can be used at the recommended dosage.
This is mentioned in the Grow Disa book, but I will improve it on the instructions label,
I put them into the cut off bottom of a water bottle and topped it up with distilled water as you can see in the picture above. So there we go. Hopefully, the plantlets take to their new home and our version of green-ish fingers! I've just ordered the Grow Disas book from SANBI as my regular online book dealers don't seem to stock it.

We bought Dr. Louis Vogelpoel's Disa book at Exotic Plant Company, but it seems a little dated. Pretty much all the information in it is available almost verbatim online in these culture notes.

Disas.com has a very comprehensive guide to deflasking.